In this guide, you will learn to Install Thunderbird on AlmaLinux 9 to Manage your Email Accounts. Thunderbird is an open-source email client that was developed by Mozilla Foundation. It is used for managing multiple email accounts, but it has other feature options including news feeds, calendar management, and chats. Also, it is a flexible, stable, customizable, and secure email client app.
Learn To Install and Manage Email Accounts with Thunderbird on AlmaLinux 9
Before you start your Thunderbird installation, you must access your AlmaLinux 9 as a non-root user with sudo privileges. To do this, you can check the Initial Server Setup Guide on AlmaLinux 9.
Now follow the steps below to start your Thunderbird installation on AlmaLinux 9.
Step 1 – Install Thunderbird via DNF on AlmaLinux 9
You can simply install Thunderbird on AlmaLinux 9 by using the DNF package manager. First, run the system update:
sudo dnf update -yThen, use the command below to install it:
sudo dnf install thunderbird -yYou can verify your installation by checking its version:
thunderbird --versionOutput
Thunderbird 115.6.0
Also, you can use another method to get the latest packages. To do this, follow the step below to get Thunderbird packages via Flatpak.
Step 2 – Install Thunderbird via Flatpak on AlmaLinux 9
If you want to get the latest stable version of Thunderbird, you can use Flatpak. First, you need to install Flatpak and enable FlatHub. To do this, you can check the following guide:
Quick Setup For Flatpak on AlmaLinux 9 and RHEL 9
Once you are done, you can use the following Flatpak command to install Thunderbird:
flatpak install flathub org.mozilla.Thunderbird
It will look for matches. Press Y to continue.


Then, install the stable package by pressing Y.


Step 3 – Run Thunderbird Email Client on AlmaLinux 9
Depending on your Thunderbird installation method, you can simply launch your app. To do this, you can use the following commands:
Thunderbird installation via DNF:
thunderbirdThunderbird installation via Flatpak:
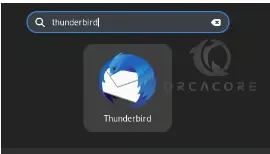
flatpak run org.mozilla.ThunderbirdAlso, you can launch it via your desktop. You can search for your app and click on it to open it.


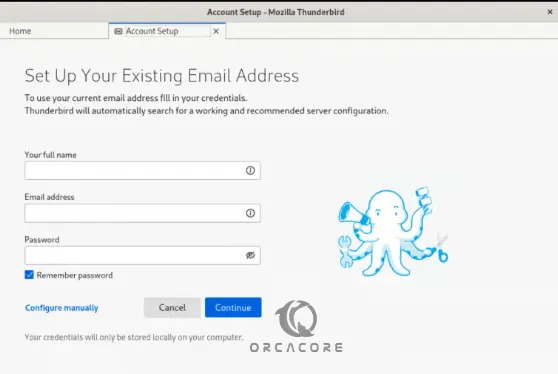
Once you launch your Thunderbird app, you will see the sign-up screen. Enter your email address to continue.
From there, you can simply manage your email accounts on Thunderbird.


Step 4 – Manage Email Account with Thunderbird
Once you are done with setting up your email accounts, you can start to manage them. Thunderbird allows you to send and receive emails, organize your emails into folders, use filters to sort emails and search through your emails. Also, you can customize Thunderbird with various add-ons, themes, and settings according to your preference.
You can access additional features like managing multiple email accounts, setting up calendars, and using chat functionalities.
Step 5 – Update Thunderbird on AlmaLinux 9
If you plan to update your Thunderbird email client app, you can simply use the following commands depending on your installation method:
$ sudo dnf update -y #Via-DNF
$ flatpak update #Via-Flatpak
Step 6 – Uninstall and Remove Thunderbird Email Client From AlmaLinux 9
If you plan to remove your Thunderbird app from your server, depending on your installation method you can use the following commands:
$ dnf remove thunderbird #Via-DNF
$ flatpak uninstall --delete-data org.mozilla.Thunderbird #Via-Flatpak
Conclusion
At this point, you have learned to Install and Manage Email Accounts with Thunderbird on AlmaLinux 9 by using the DNF package manager and Flatpak to get the latest stable version. Hope you enjoy it.
Install a Package on Ubuntu without Internet – APT Offline
CSF Firewall on CyberPanel – Installation and Configuration


